Design transfer technique in embroidery :-
Design transfer technique in embroidery:-Introduction:
 Tracing.
 Transfer Pens.
 Tracing Wheel.
There are several techniques to mark or transfer design an embroidery pattern to cloth, and one of them will definitely end up being your favorite. However, it’s a good idea to be familiar with all of your options even if you already have a preferred way over the others. The weight or color of the fabric being used can Computerized Embroidery:
Types , Machine process and Benefits:
Introduction:- Fig.Computerized Embroidery Machine.
 Fig: Free-motion machine embroidery.

A beautiful method to give any clothing a personalised touch is through embroidery, which is a timeless art form. The practise of needlework is thought to be more widely practised today than merely among grandmothers and housewives. Machines “stole” this traditional talent from women, who formerly enjoyed doing it as a leisure activity, a very long time ago. Nowadays, embroidery machines are capable of producing even the most complex designs. The term “embroiderer” used to describe a lady who embroidered. Today, it has a slightly different connotation because, in any printing facility that offers computer embroidery, the term “embroiderer” refers to the embroidery machine itself.
Fig.Computerized Embroidery Machine.The process of machine embroidery, commonly referred to as computer embroidery, entails stitching a design into fabric. By uploading a design to the machinery’s software, the pattern is predetermined. A computer-generated drawing or pattern can be converted into lovely decorative stitches that are sewed onto clothing by an embroidery machine.
Diffetent Types of Embroidery Machines:
a) Free-motion machine embroidery.
b) Computerized machine embroidery
ii) Single head embroidery machine
iii) Multi head embroidery machine.
a) Free-motion machine Embroidery:
In the case of free-motion machine embroidery, embroidery designs can be created with a straightforward zigzag sewing machine. In this type of machine embroidery, a design is created by moving tightly bound fabric beneath a needle. In this instance, the tight stitches must be manually generated by the operator using the machine’s settings in order for the embroidery to create a design or image on fabric.
Fig: Free-motion machine embroidery.b) Computer-controlled Machine Embroidery:
The majority of contemporary embroidery machines are computer-controlled and specifically made for embroidery. The frames used by embroidery machines typically hold a framed section of cloth taut beneath the sewing needle and move it automatically to create a preprogrammed design that is stored in the machine.
Fig: Computerized Embroidery.
In accordance with its capabilities, it needs a variety of user input in a predetermined digital format in order to sew the embroidery designs. Industrial embroidery machines with several needles require threading before the design is executed, but rethreading is not necessary.
Computerized machine embroidery's features include;
1)Generating a digital design file or acquiring one.
2) Revision of embroidery patterns
3)Inserting the machine’s last embroidery file
4)Position the cloth on the machine while stabilising it with a suitable amount of tension.
5)Begin the embroidery process and keep track of it.
Computerized Embroidery Machine Process:
The type of cloth to be adorned, the size of the pattern, the stabiliser selected, and the types of thread used are just a few of the numerous factors that affect the quality of the finished result during the multi-step process of machine embroidery. The following are the fundamental procedures for making embroidery on a computerized embroidery machine:
1. Create our own embroidery design file or buy a machine embroidery file that can be stitched. Depending on how complicated the design is, creation could take hours, and the programme can be expensive.
2. The design should be modified or combined with other designs.
3. Export the design file to an embroidery file for a (proprietary machine) that primarily merely contains machine commands. You might need to convert the file if you purchased one like that.
4. Make sure the embroidery file is loaded into the embroidery machine in the proper format and that the embroidered design will fit in the relevant hoop.
5. Decide where on the fabric to be adorned to place the embroidery and indicate that position.
6. Utilise the proper stabiliser to hold the fabric in a hoop and keep it on the machine.
7. Over the design’s starting point, centre the needle.
8. Start the embroidery machine and keep an eye out for any mistakes or problems. As issues arise, troubleshoot them. A large supply of needles, bobbins, an air can (or a tiny air compressor), a small brush, and scissors should be available to the operator.
9. Take the finished design out of the machine. Trim the stabiliser, stray threads, etc. after removing the cloth from the hoop.
Benefits of Computerized Embroidery:
1. User friendly:
Utilization of the computerized embroidery machine is minimal, making it fairly user-friendly. The device efficiently completes all required tasks. Operating these machines virtually ever requires prior experience or highly developed skill sets.
2. Reliable speed:
Considering that these computerized sewing machines are relatively new innovations, they are quite quick in comparison to electrical sewing machines. For the patterns to be stitched, the photographs and pictures must be converted into digital format.
3. Additional stitching features:
Complex patterns can be stitched with ease using computerized embroidery machines. According to particular requirements, any kind of designs can be digitalized and transformed into stitching patterns.
4. Accurate:
The majority of individuals favour using computerized machinery to replicate flawless designs. These devices are capable of accurately and flawlessly following instructions.
5. Patterns built-in:
These computerized devices have patterns built-in that can be customized. Additionally, it is simple to tweak and modify these patterns to create unique patterns.
Conclusion:
The process of machine embroidery, commonly referred to as computer embroidery, entails stitching a design into fabric. By uploading a design to the machinery’s software, the pattern is predetermined. Specialized devices known as computerized embroidery machines can produce embroidery from computer-generated designs. Such devices are available for the large manufacturing market, the home market, and the small independent professional. Instead of making your clothes, embroidery machines are utilized to stitch onto the fabrics. They are used to make branded workwear, sportswear, and a variety of other customized apparel items. They aren’t utilized to combine materials to create whole pieces of clothing because they can’t actually produce the clothes themselves.
Ref:-https://www.textilelearner.net
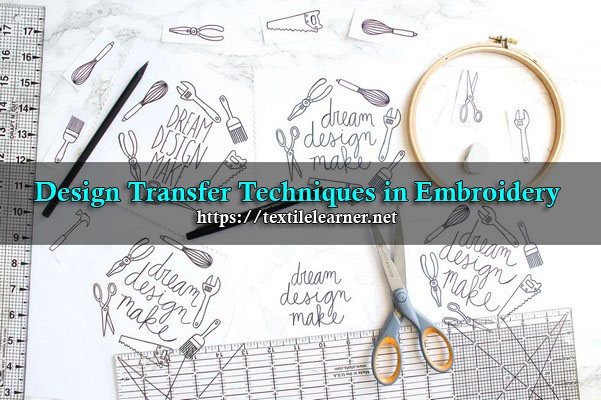
Design transfer techniques in embroidery.
Various Design Transfer Techniques:
1. Tracing:
If the fabric is quite thin, you can transfer the drawings directly onto the fabric by drawing the lines using a chalk-based marking pencil or a water-soluble transfer pen or pencil and utilizing a light source, like a light box or window. A regular pencil that has been finely sharpened will also do in a pinch. When utilizing a window or other source of light to transfer a design, tape the pattern to the glass and cover it with cloth. You should be able to easily see the pattern through the fabric so that you can use your marking pencil or pen to copy the lines.
2. Water-Sluble Stabilizer:
The water-soluble stabilizer approach is a fantastic choice if you’re working with dark fabrics or if your pattern is intricate. The pattern can be printed directly onto the stabilizer using this material, which can then be placed on the embroidery fabric. Stabilizer will dissolve from the needlework after it has been stitched through the fabric and stabilizer. You must ensure that your cloth can be cleaned and that your embroidery floss is colorfast because this technique calls for soaking
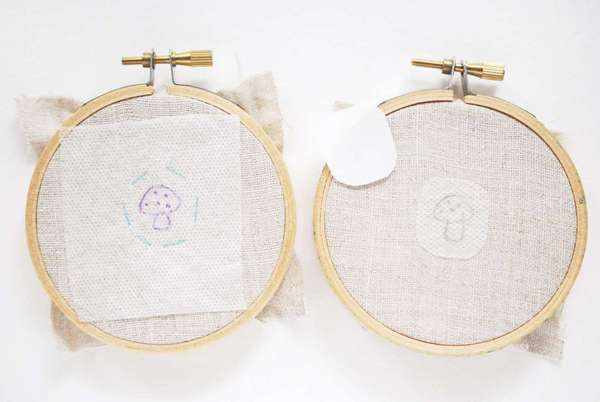
Water-Soluble Stabilizer.
3. Transfer Pens:
Commercial transfer embroidery pens are widely available. It is crucial to test out the pen you decide on in order to assess the color’s intensity, the thickness of the tip, and whether it is permanent or water-soluble. Some pens fade out over time, while others are heat-removable. Fade-out pens are useless because they don’t last as long as embroidery may. Because permanent pens cannot be removed, they must be concealed with needlework.
4. Light Source or Lightbox Method:
The light source technique is excellent for directly printing designs on fabric. A genuine light box or a brilliant window can serve as the source of illumination.
Using a window or lightbox, transfer embroidery patterns:
.The cloth over the paper template after laying out the design.
.Attach your light source securely to the fabric and design.
.Use sticky tape to secure my fabric and pattern while utilizing a window.
.It is possible to trace the pattern directly onto the fabric since the light passes through both the design and the fabric.
5. Tracing Wheel:
A very traditional way of copying patterns is with a wheel that has tiny spikes on a handle. It favors larger designs and works swiftly.
How to use carbon to transfer embroidery patterns:
The tracing wheel, cloth or dressmakers carbon paper, and your pattern must be printed or drawn on some tracing paper. (Avoid using standard carbon paper.)
Put the carbon in between the fabric and the paper pattern. Place the carbon with the face down.
As you move the wheel along, it transfers information onto the fabric via the carbon as it pricks through the paper.
6. Printer Ink Method:
Many inks from ink jet printers can be heated up and transferred to cloth or another surface. I’ve not had as much luck using toner ink. I think this is my least effective way for transferring needlework designs. Try the heat transfer as soon as the paper is printed, while the ink is still fresh, as that is when it will work the best.
a) Use your printer to print your pattern.
Place the paper with the ink side facing the correct side of your cloth.
b) Use a symmetrical design to avoid having your image reversed. You should print the image in reverse if your design includes text.
Use a hot, dry iron to press.
c) Pull up an edge slowly to see if the design has transferred, being careful not to disturb the paper or fabric.
Conclusion:
Transferring an embroidery pattern to cloth can be done using a variety of approaches. Choose the embroidery design transfer techniques that will work best for your pattern’s complexity, the colour and texture of your cloth, and all three. There are various techniques to apply an embroidered pattern on fabric. Carbon paper, water-soluble pens, iron-on pens, soluble paper, and friction pens are a few examples of frequent transfer methods. Depending on the design and cloth, you will decide how to transfer your pattern. In other words, the level of pattern detail and the fabric’s characteristics (such as thickness, stretchability, and so on).
Ref:-https://textilelearner.net & printerest


Comments
Post a Comment